Graphic Design Path
I like to move it move it - let’s make the character animated
The game in its current state is very static. It will become much more lively with some animations.
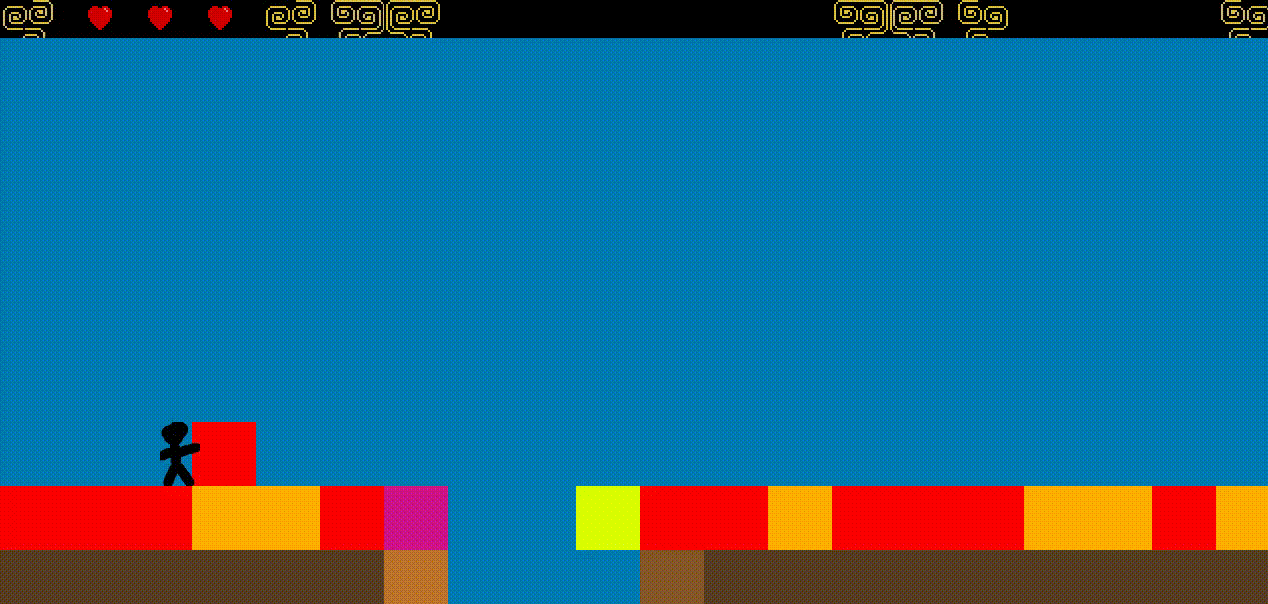
It’s the difference between this:
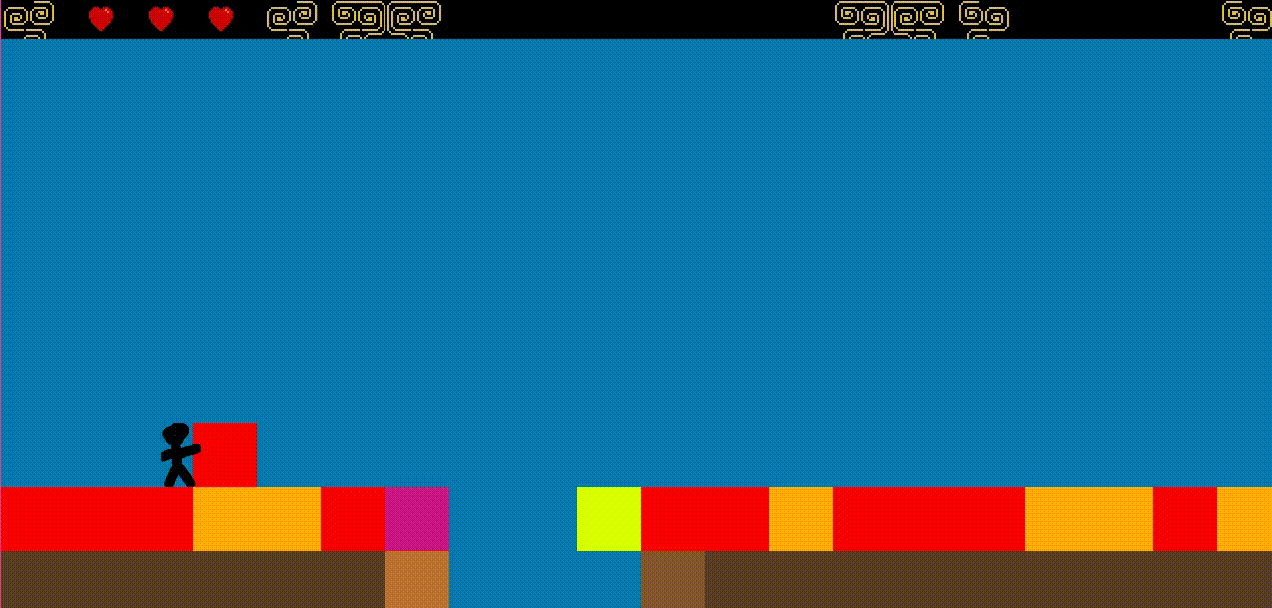
And this:
How can we do this? First, we’ll need to learn about how frame animation works.
But they framed me! - about frame animation
Frame-by-frame animation is a kind of animation, where still images with only slight changes between each are shown in sequence. If the transition between them is fast enough, it appears like fluid motion. In films, this is called stop motion animation, and most typical examples of it are hand-drawn animated cartoons.
This kind of animation is very easy to make, if we focus on having just a few frames - these are called key frames. More key frames lead to a more fluent appearance, but take longer to make.
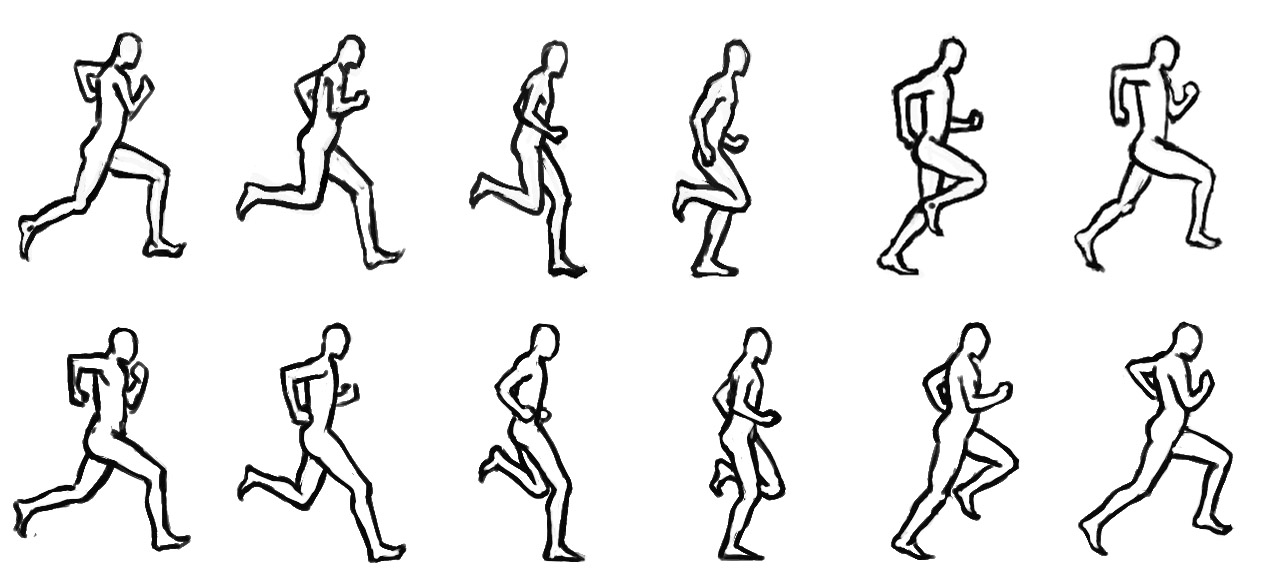
Here is what the frames for a runninng animation could look like:
When loaded into memory, each of the frames takes on a shape - for simplicity we will stick to it being just a surrounding rectangle. The drawing fitted to a particular shape is called a sprite.
This is why an image like this, with all the frames in one place, is called a spritesheet.
Our game also has a spritesheet for the character.
You can find it in assets/images/player.png.
This image can be opened with any image editor, if you are using DICE, GIMP is a good toolkit that is already installed.
Avoid using paint, as its older versions do not support transparency.
On an own Windows laptop, paint.net is an excellent tool.
Once opened, the image should look like this:
![]()
It’s a 2x7 spritesheet, with 7 frames for facing right and 7 for facing left.
Currently, the game does not use these animation frames at all, let’s change that!
Graphic design involves coding too - loading the spritesheet
First, open Boy.java.
Let’s inspect the constructor of the class to see how the spritesheet is loaded.
When a new Boy object is created, the first couple of lines initialise two arrays:
public Boy() {
    // Initialise the buffers that will store the run sprites
    run_L = new BufferedImage[Settings.BOY_RUN_FRAMES];
    run_R = new BufferedImage[Settings.BOY_RUN_FRAMES];
BOY_RUN_FRAMES is a constant defined in Settings.java.
You will have to adjust its value, if you decide to change how many key frames to use for animations.
In the unmodified framework, its declaration looks like this:
// Number of the run animation frames of the player in the spritesheet
public static final int BOY_RUN_FRAMES = 6;
Why is this 6, when the spritesheet had 7 frames??? The answer will become clear when we look at the rest of the Boy constructor:
// Load all the sprites needed to animate the character
try {
    BufferedImage spritesheet = ImageIO.read(getClass().getResource(Settings.playerSpritesheet));

    idle_R = spritesheet.getSubimage(0,
                                        0,
                                        Settings.BOY_SPRITE_WIDTH,
                                        Settings.BOY_SPRITE_HEIGHT);

    idle_L = spritesheet.getSubimage(0,
                                        Settings.BOY_SPRITE_HEIGHT,
                                        Settings.BOY_SPRITE_WIDTH,
                                        Settings.BOY_SPRITE_HEIGHT);
This part loads the spritesheet image from the image file (its name is defined in Settings.java) like this:
public static final String playerSpritesheet = "/images/player.png";
Then it takes two subimages and assigns them to idle_R and idle_L.
Here the relevant settings are :
// Dimensions of the boy sprite
public static final int BOY_SPRITE_WIDTH  = 40;
public static final int BOY_SPRITE_HEIGHT = 64;
Like we discussed earlier, each frame is applied to a shape to obtain a sprite. Here the shape is just a rectangle with these specified dimensions.
If you decide to make the character bigger or smaller, you will need to adjust these constants. But beware - this might mess with collision detection, so you will have to work together with your game development teammate to fix it.
The getSubimage function takes 4 parameters:
the top-left corner X coordinate,
the top-left corner Y coordinate,
the width and the height of the rectangle to take out.
The first line takes a 40x64 rectangle with its top-left corner at (0,0) of the spritesheet, which is the first frame in the image.
Respectively, the second line takes a rectangle of the same size from just below the first one (with top-left corner at (0,64)).
This way, the two left-most frames of the spritesheet are used as idle frames - displayed when the character is not moving.
The remaining 6 will be used for the running animation.
Next, the constructor loads these 6 sprites into the run_L and run_R arrays created earlier:
for (int i = 0; i < Settings.BOY_RUN_FRAMES; i++) {
    run_R[i] = spritesheet.getSubimage((i + 1) * Settings.BOY_SPRITE_WIDTH,
                                        0,
                                        Settings.BOY_SPRITE_WIDTH,
                                        Settings.BOY_SPRITE_HEIGHT);

    run_L[i] = spritesheet.getSubimage((i + 1) * Settings.BOY_SPRITE_WIDTH,
                                        Settings.BOY_SPRITE_HEIGHT,
                                        Settings.BOY_SPRITE_WIDTH,
                                        Settings.BOY_SPRITE_HEIGHT);
}
The loop logic might make this a little confusing at first, it might help to see how the arguments to getSubimage change as i changes.
When i = 0, run_R[0] get the 40x64 subimage with top-left corner at (40,0).
This is to the right of the first frame.
run_L[0] gets the 40x64 subimage with top-left corner at (40,64) - just below the other frame.
Hopefully this makes sense, but you can walk through some more loop iterations yourself to get a clearer understanding.
How would this loop have to change if you had more animation frames or if they were different sizes?
Due to the way it’s implemented - it wouldn’t have to change at all, you just need to change the constants in the Settings class ᕕ( ͡° ͜ʖ ͡°)ᕗ
This is what you came for - let’s get to implementing those animations
To add in animations, we will need to change what frame is used to draw the character as it moves.
Find the moveLeft function in Boy.java.
It should look like this:
public void moveLeft(boolean isLastLevel) {
    idle = false;
    facingDirection = KeyEvent.VK_LEFT;

    // Attempt to move left by DISPLACEMENT amount
    currentX = checkMove(currentX, currentX - DISPLACEMENT, isLastLevel);
    boundingBox.setLocation(currentX, currentY);
}
Modify the function, so that it looks like this:
public void moveLeft(boolean isLastLevel) {
    idle = false;
    facingDirection = KeyEvent.VK_LEFT;

    // Attempt to move left by DISPLACEMENT amount
    currentX = checkMove(currentX, currentX - DISPLACEMENT, isLastLevel);
    boundingBox.setLocation(currentX, currentY);

    // Change the current frame in animation
    setFrameNumber();
    currentFrame = run_L[currentFrameNumber];
    moveCounter++;
}
Making the respective modification for the moveRight function is left as an exercise.
These changes use the setFrameNumber function - what does it do?
Let’s take a look:
private void setFrameNumber() {
    currentFrameNumber = moveCounter / MOVE_COUNTER_THRESH;
    currentFrameNumber %= Settings.BOY_RUN_FRAMES;
    moveCounter %= MOVE_COUNTER_THRESH * Settings.BOY_RUN_FRAMES;
}
In essence, it chooses the next animation frame from the current one, wrapping around to the first if we get to the last one. For more details, check out the comments above this function in the code.
Try running the game. How does it look now?
Try walking about while jumping. Doesn’t it look weird, when the character’s legs move in mid-air?
Let’s tweak this by modifying the move functions again, so they look like this:
public void moveLeft(boolean isLastLevel) {
    idle = false;
    facingDirection = KeyEvent.VK_LEFT;

    // Attempt to move left by DISPLACEMENT amount
    currentX = checkMove(currentX, currentX - DISPLACEMENT, isLastLevel);
    boundingBox.setLocation(currentX, currentY);

    // Change the current frame in animation
    if (!jumping && !falling) {
        setFrameNumber();
        currentFrame = run_L[currentFrameNumber];
    } else {
        currentFrame = run_L[0];
    }

    moveCounter++;
}
Try running the game now. How does it look?
We can also animate taking off, when the character jumps.
To do this, you will need to modify the startJumping function.
Initially it looks like this:
// Called every time the player presses the jump key
public void startJumping() {
    if (currentY - DISPLACEMENT >= 0) {
        currentY -= DISPLACEMENT;
        boundingBox.setLocation(currentX, currentY);
    }
}
Adding in an animation will make it look like this:
// Called every time the player presses the jump key
// Does nothing if the character is already jumping or falling
public void startJumping() {
    if (!jumping && !falling) {
        jumping = true;

        // Reinitialise the jump_count, useful to determine for how
        // Much time the character is going to stay in the air
        jump_count = 0;

        // Sets the current jumping frame based on the last direction
        if (facingDirection == KeyEvent.VK_RIGHT) {
            currentFrame = run_R[2];
        } else {
            currentFrame = run_L[2];
        }
    }
}
This is it! You have successfully added animations to the game ٩(▀̿Ĺ̯▀̿ ̿٩)三
Now the game moooves - some further reading
In this guide we have looked at implementing animations. In the interest of brevity and conciseness, many details were overlooked.
If you are interested in learning about animation in more detail, here is an amazing article about it: An Introduction to Spritesheet Animation
That’s all for now! See you in the next guide beyond the portal :)
